
Your favorite turkey crafts for preschool are bound to keep your art center the hub of thanksgiving activity this year! There are so many turkey crafts that I have enjoyed making with my classes over the years. So, I thought I would share my favorites with you. Keep in mind, I use one size of turkey feather for most crafts. I learned the hard way that different sized feathers make no sense! I also now use just a large brown circle for most turkey bodies, but you do you! Some of my photos are from before I learned these valuable lessons, so bear with me!
Word to the wise: Cut a TON of turkey feathers and circles at the beginning of the month, so you aren’t panicking at the end of November!
Coffee Filter Turkeys
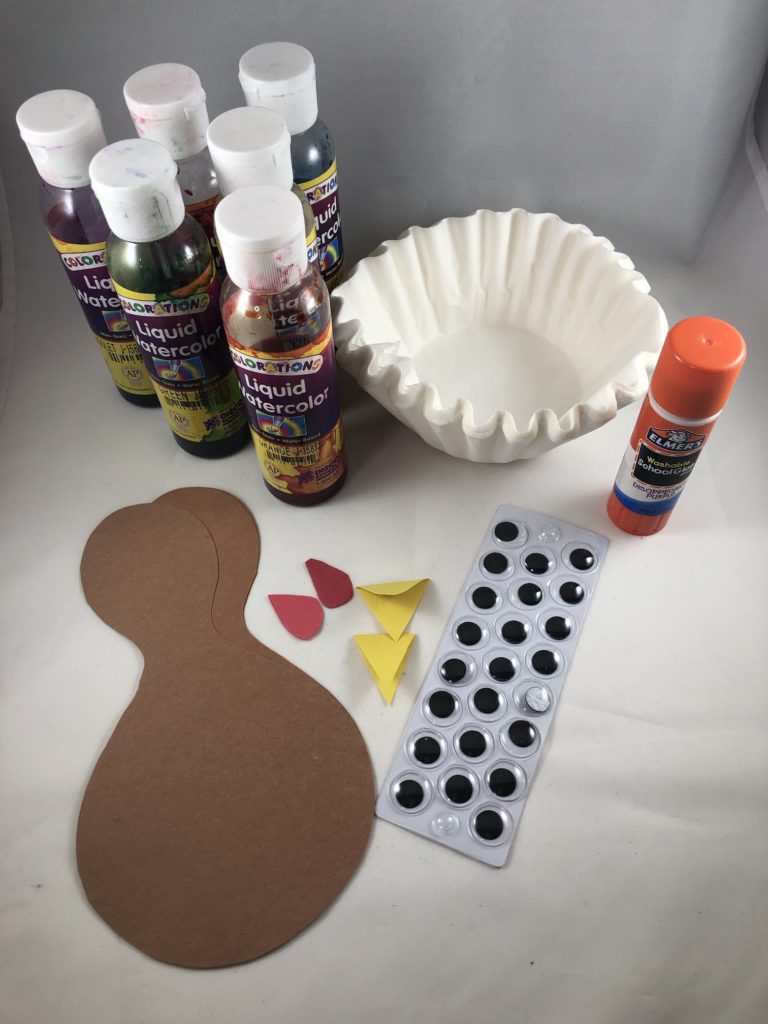
Start by gathering your supplies. You will need the following items :
- Coffee filters
- liquid watercolors in fall colors-keep colors saturated with just a little water
- cups for paint
- droppers for paint
- cut turkey bodies, beaks, and waddles
- glue sticks
- google-y eyes (I prefer self-stick)
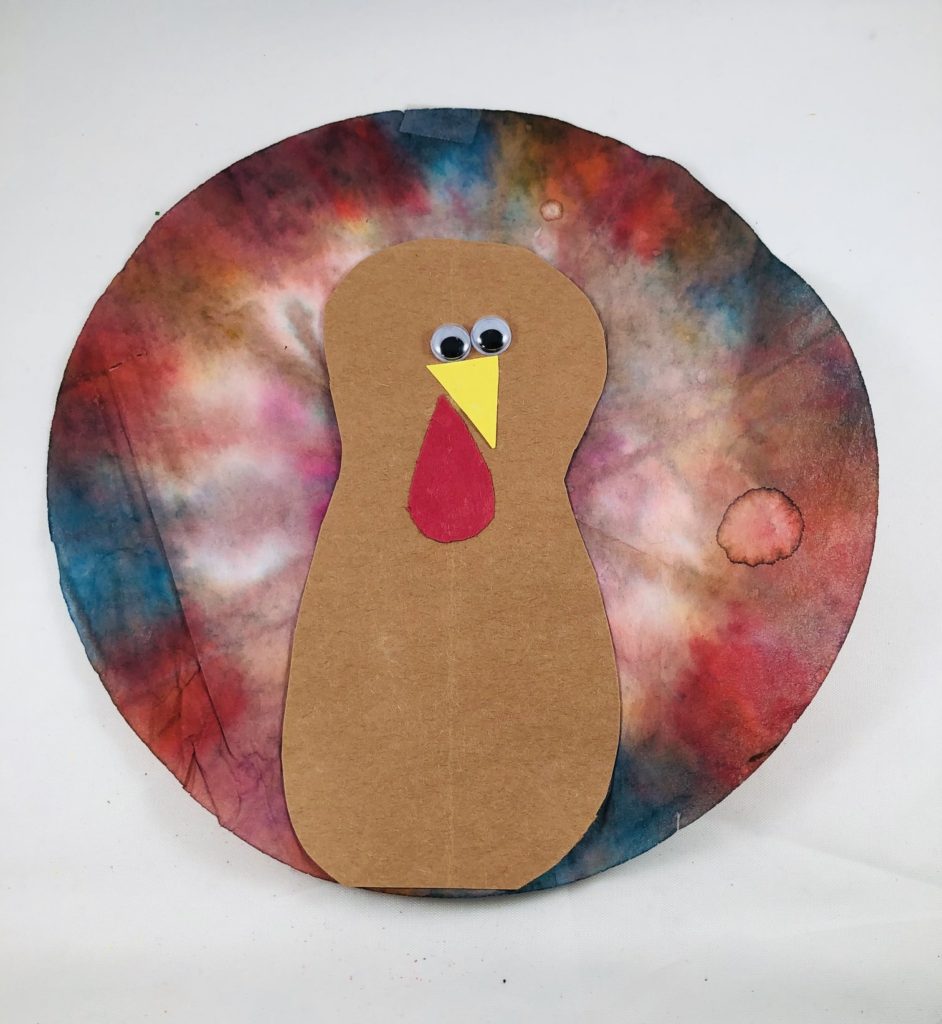
Prep all materials and mix watercolors. First, give each child a coffee filter on a paper towel-lined tray. Secondly, demonstrate how to use ‘pinchy’ fingers to bring watercolor into the dropper and squeeze the bulb to drop the paint onto the filter. This is fantastic fine motor work for those little hands! Instruct your kiddos to saturate the entire coffee filter. Then leave on a rack to dry.
You can assemble the turkey bodies the following day and use the glue sticks to glue the bodies onto the colored filters to make a beautiful turkey! Finally, put the turkeys up in the window to showcase their colorful beauty and decorate your classroom!
Turkey Hats

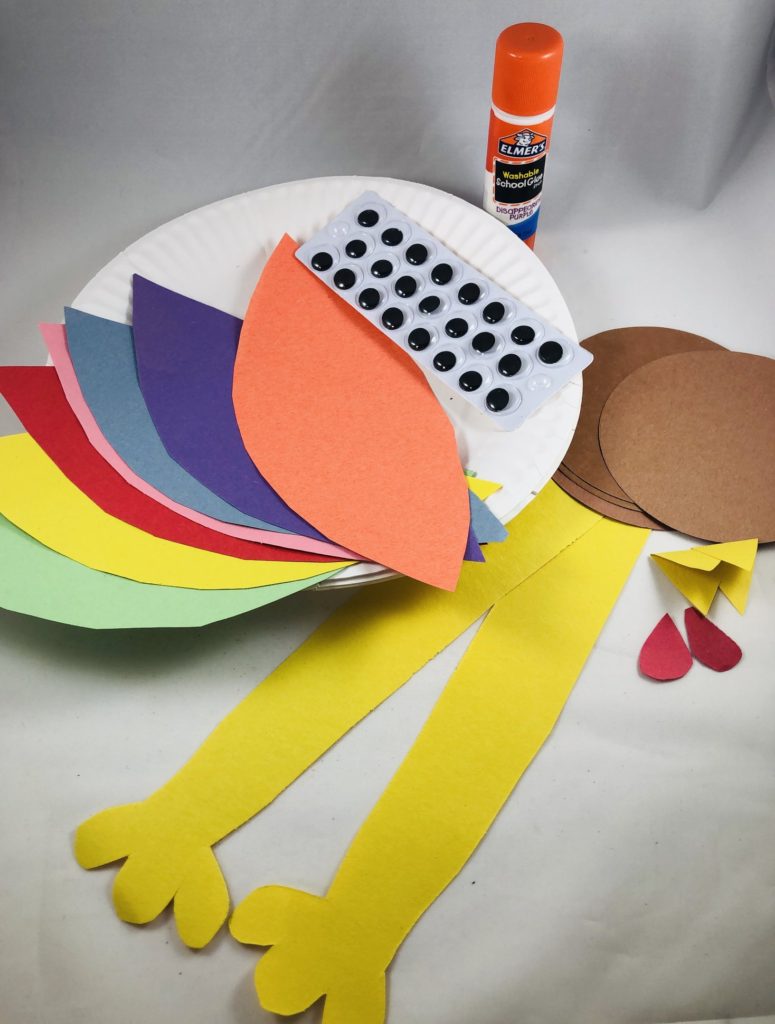
One of my favorite turkey crafts for preschool is…Turkey Hats! I love my turkey hats so much! We have a thanksgiving feast the day before break, and everyone wears their turkey hats…it is beyond adorable! Unlike the coffee filter turkeys, these are a one-day project. Here is a list of what you will need:
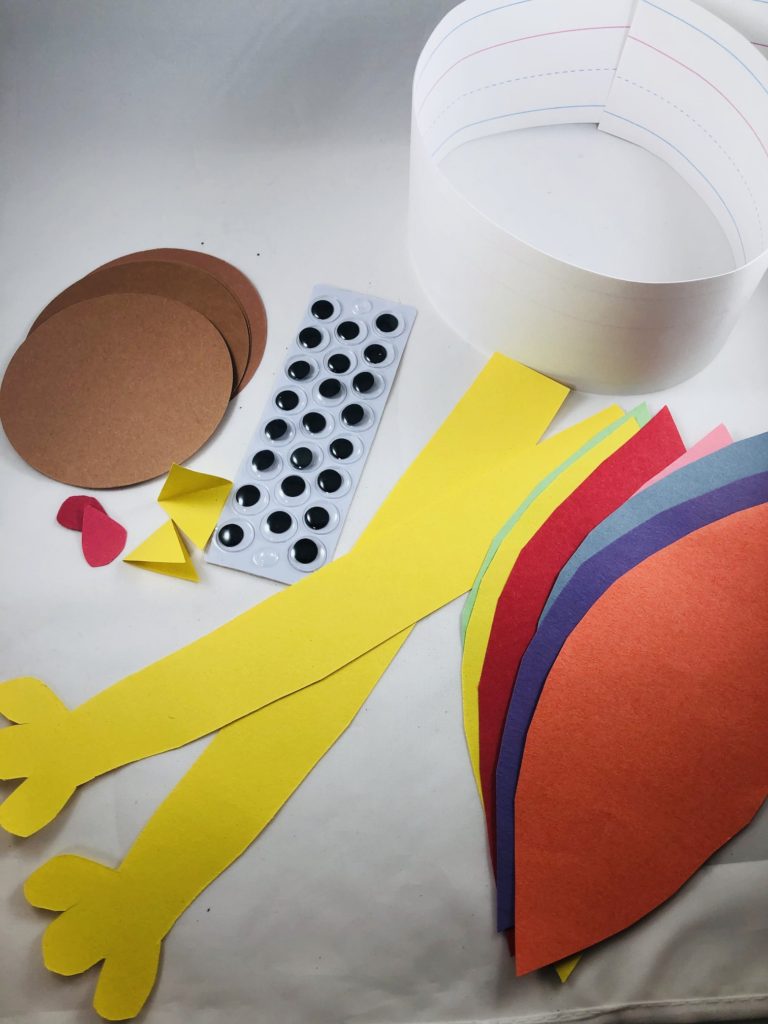
- Cut turkey feathers in multiple colors
- Cut brown circles for turkey bodies-about 4 inches in diameter
- long legs cut from yellow construction paper and accordion folded
- Cut beaks and waddles
- Self-stick google-y eyes
- glue sticks
- Cut brown strips for bands or just use sentence strips-so much easier!
- stapler
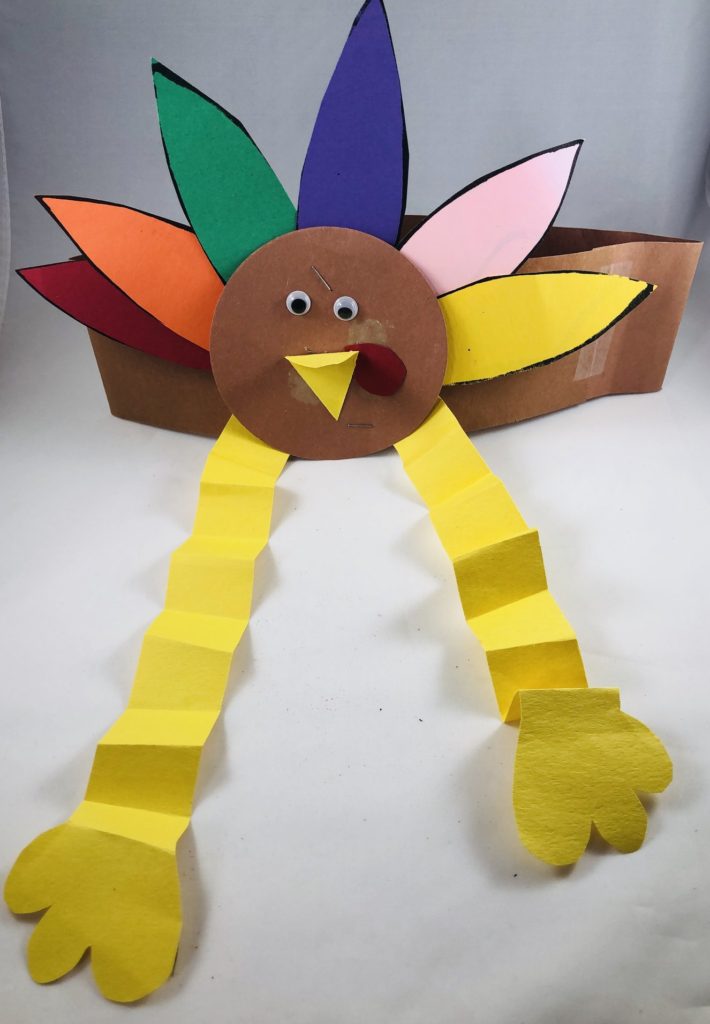
Set out feathers, circles, legs, and other parts on trays in the art center. Then give each child a glue stick and brown circle. Next, ask each child to pick out 4-5 feathers in different colors to glue to the back of the circle. Then, glue the legs to the bottom sides of the brown circle. You will then want to turn the circle over and add the eyes, the beak, and the waddle. When all the pieces are put together, you can then staple the turkey body to the sentence strip. Lastly, measure the child’s head with the strip and staple to fit forming the hat. Seriously…the cutest turkeys you’ll ever see!
Pinecone Turkeys

Another favorite turkey craft for preschool is Pinecone Turkeys! I live in an area where pinecones are plentiful, so pinecone turkeys are a great craft for this time of year. The one pictured above is from a few years ago when I used pipe cleaners for the waddles, but now I just use paper. Here is a list of supplies needed:
- pinecones-any size
- craft feathers
- turkey heads cut from brown paper
- beaks and waddles cut from yellow and red paper
- self-stick google-y eyes
- liquid glue
- glue sticks
Prep all cut pieces and assemble on a tray. First, give each child a pinecone. Next, place a tray of feather and some small pots of liquid glue on the table. You will then want to instruct the kids to dip one end of the feathers into the glue and place inside the fat end of the pinecone anywhere they would like. Next, give each child a turkey head. Then add the eyes, beak, and waddle. Finally, use the liquid glue to glue the head in place at the top of the pinecone. Allow to dry. These cuties will be a loved decoration for years to come!
Sitting Paper Plate Turkeys

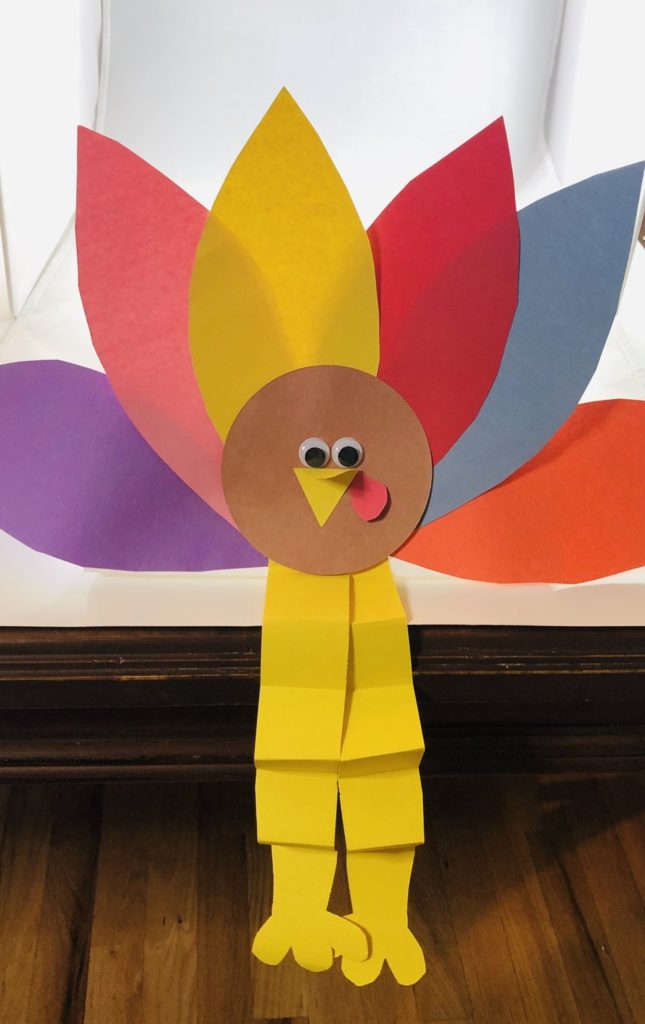
Out of all my favorite turkey crafts…this one is loved most by the kiddos! I use the same legs, feathers, and body assembly as I do for the hats. There is one difference though, I use a paper plate and fold the bottom third so the turkeys can sit on a table or mantle! I’m already grateful for their cuteness! here is what you need:
- cheap, white paper plates
- paper turkey feathers
- brown circle for turkey body-about 3-4 inches in diameter
- long yellow turkey legs cut from construction paper and accordion folded
- beaks and waddles cut from red and yellow paper
- glue sticks
First, get a paper plate for each child and fold the bottom 1/3-1/2. Next, glue a fanned array of turkey feathers onto the plate. Then, glue legs near the bottom near the fold. Give each child one brown circle and instruct them to add 2 eyes, a beak, and waddle-this will form the body. Then glue completed turkey body onto the plate so the feathers fan behind it. Sit your turkey on a table! So cute!
Paper Plate Name Turkeys

This favorite turkey craft adds name writing practice too! The photo above shows 2 brown circles, I have since wised up and now only use the one large circle to make my turkey body…it’s easier that way! Here is what you need for this fun craft:
- cut paper turkey feathers in various colors.
- brown circles 3-4 inches in diameter
- self-stick google-y eyes
- cut beaks and waddles (yellow and red)
- glue sticks
- markers
- cheap, white paper plates
First, give each child a paper plate. One thing I like to do is give them a name strip so they can see their names and what all the letters look like. I like to count the letters in each child’s name with them slowly, then I ask them to pick that many feathers. If a child has a really short name like “Ila”, I let them pick extra feathers to fill in the turkey. Together we will work on writing one letter on each of the feathers until they have written each letter in their name. Then, we arrange them in order and glue them onto the plate. After the feathers are glued on, we assemble the body and add it on top so the feathers fan behind it. Next, use the markers to add legs and anything else the kids want! Mine will usually add a smile…even though the beak is the mouth…its pretty cute!
As you can see, I have used the same brown circles and paper feathers for 3 of the 5 crafts I have listed…it really does make your November easier!
I hope you will add some of these crafts to your Thanksgiving unit! If you are looking for more great Thanksgiving ideas you should check out my “All About Thanksgiving 5-day Lesson Plan for Preschool, PreK, Kindergarten & Homeschool” for more Art, Math, and Literacy activities for this awesome holiday!
HAPPY THANKSGIVING!


